Your site online,
step by step.
From the downloaded zip to a site on your own domain, without a terminal or software to install. Everything happens in your browser.
- Time
- About an hour, domain aside
- Cost
- Free. A domain is €10–15 a year
- Accounts
- GitHub, Cloudflare, ChatGPT
- To install
- Nothing. A browser is enough
Step 01 15 min Set up your accounts and content
Three free accounts, and everything the site has to say gathered in one folder.
Set up your accounts and content
Three free accounts, and everything the site has to say gathered in one folder.
Three tools, each with one job. All of them have a free plan that covers a business site; only the domain name costs money, and it is optional.

| Tool | What it does | Price |
|---|---|---|
| GitHub | Holds your site’s files and the history of every change. | Free, private repositories included |
| Cloudflare Pages | Builds the site and publishes it, automatically, on every change. | Free |
| ChatGPT | Edits the files for you when you ask in plain words. | Free: the free plan is enough |
| Domain name | Optional: your address, such as your-domain.com. | €10–15 a year |
Create the accounts
- Sign up at github.com . Pick a plain username: it shows in your repositories’ addresses.
- Sign up at dash.cloudflare.com .
- If you do not have one yet, sign up at chatgpt.com .
Gather your content
Put everything in one folder on your computer before you start: customising goes much faster.
- Logo: SVG if you can, otherwise PNG on a transparent background.
- Copy: one document per page is enough (home, about, services…).
- Photos: JPG, 2,000 px wide at most, with plain names (
team.jpgrather thanIMG_4032.JPG). - Contact details: address, phone, email, opening hours, social links.
- Colours: your brand’s codes (for example
#1F4E79), if you have them.
Step 02 10 min Put the theme on GitHub
A private repository, and the theme’s files dropped into it.
Put the theme on GitHub
A private repository, and the theme’s files dropped into it.
Create the repository
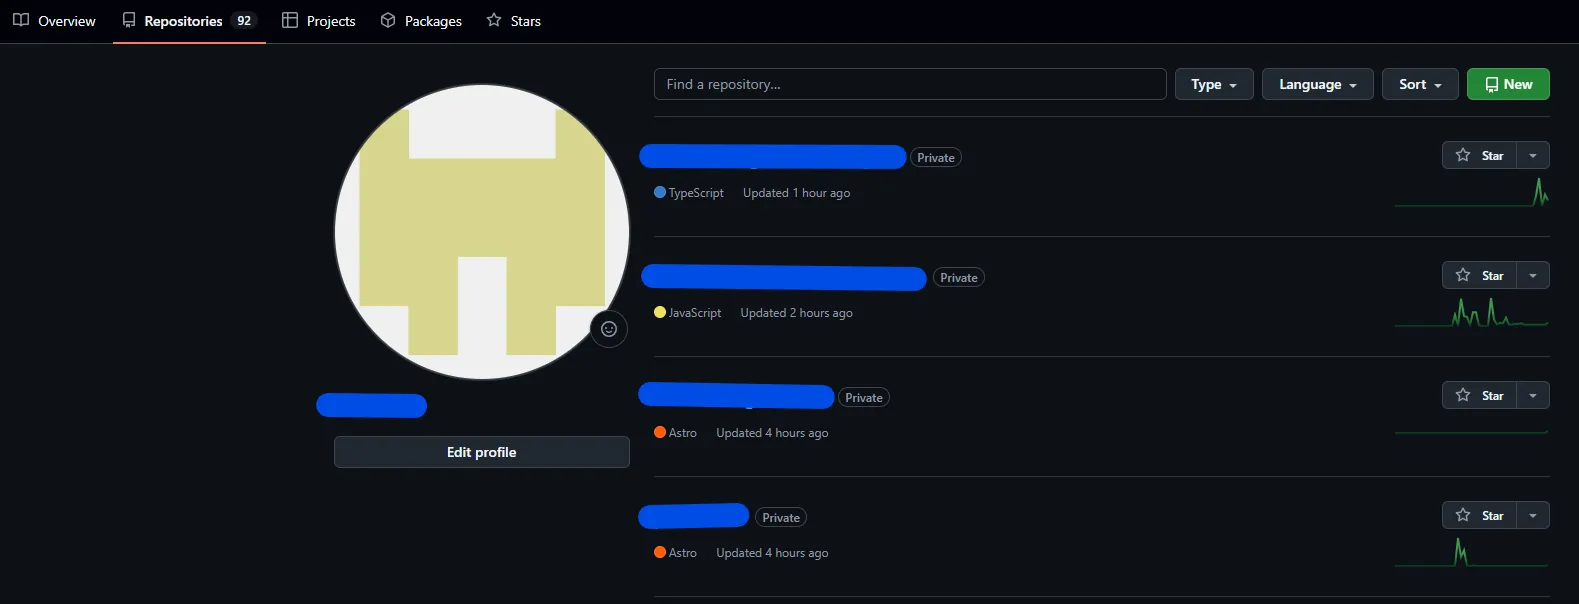
- On GitHub, open the Repositories tab of your profile and click the green New button (or + at the top right, then New repository).
- Name it, for example
my-site, and tick Private. Tick nothing else: no README, no.gitignore, no licence. - Click Create repository.
Prepare the files
- Unzip the
.zipfile you downloaded: on Windows, open it and click Extract all; on a Mac, double-click it. - Open the folder it produces (
theme-name-v1.0.0). You will upload what is inside it, not the folder itself.

.zip open in Windows File Explorer: a single folder, the theme’s, and the Extract all button.Upload the files
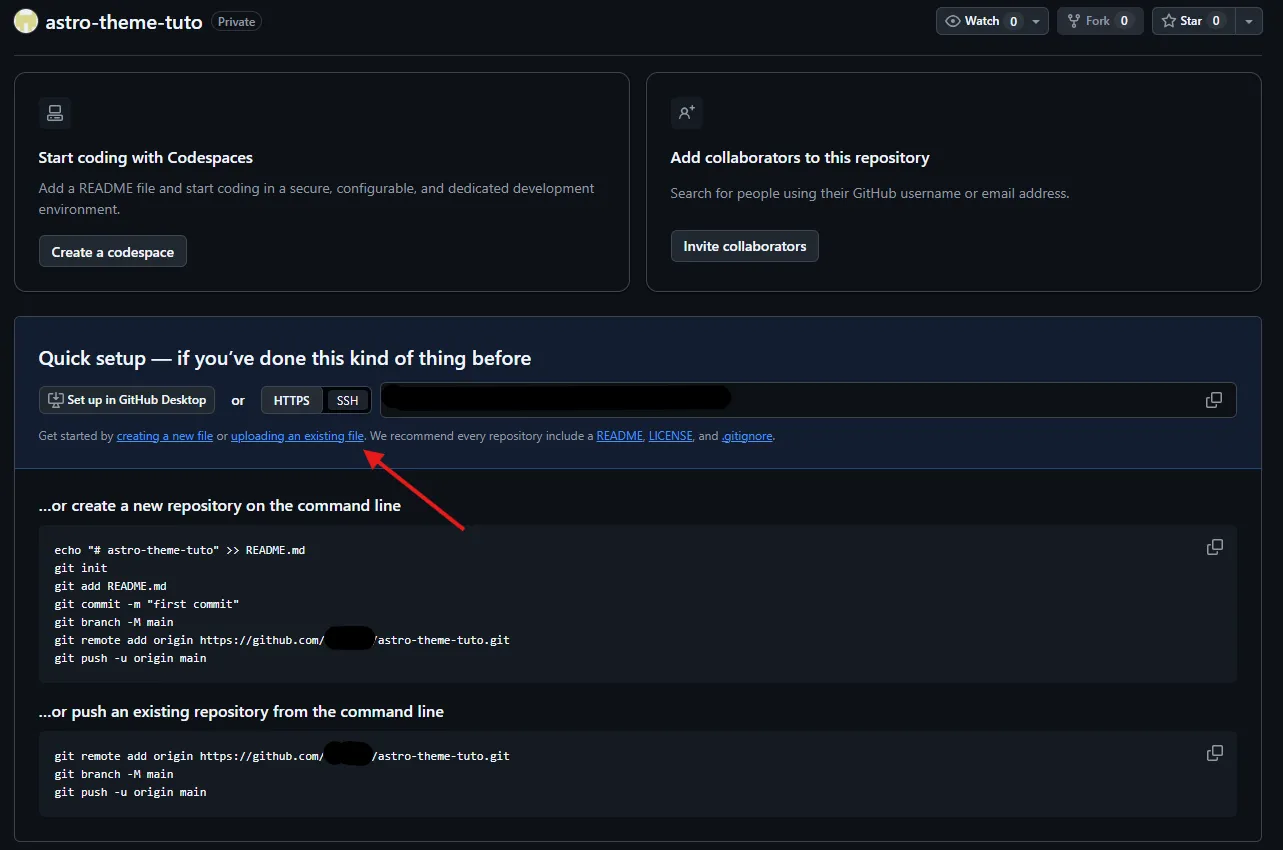
- On the empty repository’s page, click the uploading an existing file link.
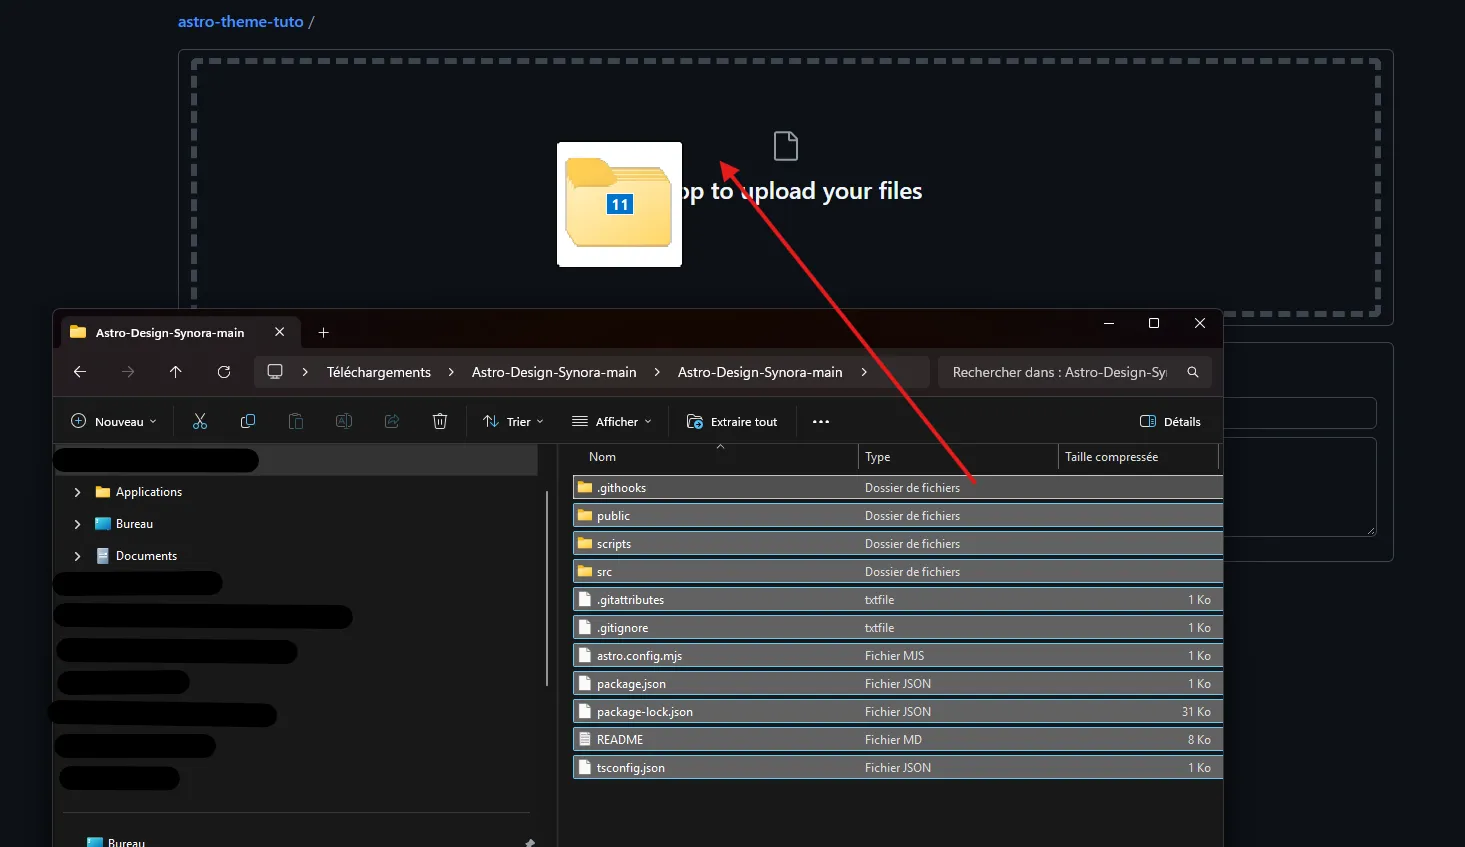
- In the theme folder, select everything (Ctrl + A, or Cmd + A on a Mac) and drag the selection into the GitHub window.
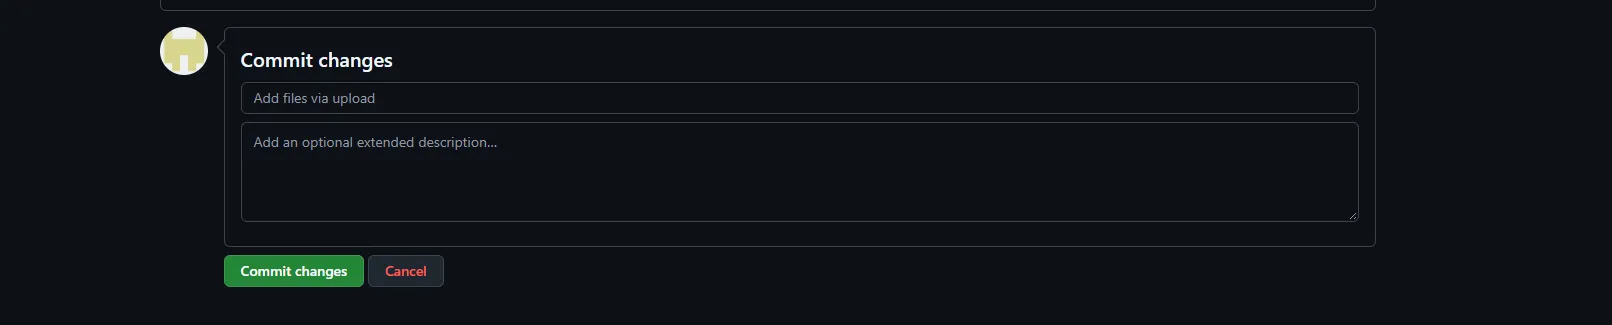
- Wait for the upload to finish, then click Commit changes.
Step 03 10 min Publish with Cloudflare Pages
Cloudflare reads your repository, builds the site and gives it a temporary address.
Publish with Cloudflare Pages
Cloudflare reads your repository, builds the site and gives it a temporary address.
Publish before you customise: from this step on, every change saved on GitHub goes live by itself, and you see each one on the real site.
Connect Cloudflare to GitHub
- In Cloudflare, open Workers & Pages in the left menu, then click Create application.
- Choose Pages, then Import an existing Git repository. Cloudflare sometimes puts Workers first: look for the word Pages.
- Click Connect GitHub and authorise Cloudflare. When GitHub offers it, choose Only select repositories and pick your repository: Cloudflare only needs that one.
- Select the repository, then Begin setup.
The exact settings
| Field | Value |
|---|---|
| Project name | my-site (your temporary address will be my-site.pages.dev) |
| Production branch | main |
| Framework preset | Astro |
| Build command | npm run build |
| Build output directory | dist |
- Click Save and Deploy. The first build takes a minute or two.
- When the success message shows, open
https://my-site.pages.dev: your site is live, with the theme’s demo content.
Step 04 30 min and up Customise the site with ChatGPT
You describe what you want; ChatGPT edits the files in the repository.
Customise the site with ChatGPT
You describe what you want; ChatGPT edits the files in the repository.
Connect GitHub to ChatGPT (once)
- In ChatGPT, open Settings → Apps (the menu may be called Connectors, depending on the version).
- Choose GitHub, then Connect.
- GitHub asks you to install the ChatGPT app: choose Only select repositories and pick your repository. Give it access to that one only.
The first message
Start a new chat, turn GitHub on (the + button under the message box), then paste this message, replacing what is in brackets. It sets the rules for everything that follows.
You are working on my website, in the GitHub repository [your-name/my-site]. It is an Astro site built from a theme, published automatically by Cloudflare Pages on every change to the main branch.

Before you change anything:
1. Read the README, package.json and the src folder, then tell me in a few lines where each page's text, the images, the colours and the contact details live.
2. Do not change the structure, the layout or the dependencies unless I ask.

For every change I ask for:
- save it directly in the repository, on the main branch, with a clear message;
- tell me which files you changed;
- check your work: every image and every link must point to a file that exists in the repository.

My details:
- Business name: [...]
- What we do, in one sentence: [...]
- Address, phone, email: [...]
- Social links: [...]
- Main colour: [#......]Then one request at a time
Short, precise requests work best. For example:
- “On the home page, replace the main heading with: …”
- “Replace the text of the About page with this: …”
- “Update the phone number and address everywhere on the site: …”
- “Change the site’s main colour to #1F4E79.”
- “Delete the demo article ‘…’ and remove it from every list.”
Add your images
You upload your photos to GitHub; ChatGPT then puts them in the right places.
- On GitHub, open the theme’s image folder (often
public/imagesorsrc/assets: ChatGPT told you in its first answer). - Click Add file → Upload files, drop your photos, then Commit changes.
- In ChatGPT: “I added
team.jpgtopublic/images. Use it instead of the photo on the About page.”
Step 05 2 min per change Check and approve the changes
Every change goes through GitHub, then Cloudflare puts it live in a minute or two.
Check and approve the changes
Every change goes through GitHub, then Cloudflare puts it live in a minute or two.
On GitHub: what changed
- On the repository’s page, click Commits (the clock icon above the file list): every change is listed with its message.
- Click a change to see the detail: the old text in red, the new in green.
- If ChatGPT opened a pull request instead of saving directly: open the Pull requests tab, open it, look at Files changed, then click Merge pull request and Confirm merge.
On Cloudflare: going live
- In Workers & Pages, open your project: a new deployment appears for every change.
- Success: open the site and check the change. If it does not show, reload the page (Ctrl + F5, or Cmd + Shift + R on a Mac).
- Failed: open the deployment, copy the last lines of the log and paste them into ChatGPT: “The build fails with this message, fix the problem.”
Step 06 15 min, then up to 24 h Connect your domain name
Your site moves from my-site.pages.dev to your own address, over HTTPS.
Connect your domain name
Your site moves from my-site.pages.dev to your own address, over HTTPS.
You do not have a domain yet
- The simplest is to buy it from Cloudflare (Domain Registration → Register Domains), at cost. It is then already tied to your account.
- In your Pages project, open Custom domains → Set up a custom domain, type the domain and confirm. Cloudflare creates the DNS record itself.
You already have a domain (GoDaddy, Namecheap, OVH…)
- Recommended: hand the DNS to Cloudflare. In Cloudflare, click Add a domain, then at your registrar replace the nameservers with the two Cloudflare gives you. The domain stays with your registrar; only the DNS moves. Then, as above: Custom domains → Set up a custom domain.
- For a subdomain only (for example
www.your-domain.com): keep your current DNS and add a CNAME record at your registrar, namedwww, pointing atmy-site.pages.dev. Declare that subdomain under Custom domains too.
One last touch
Tell ChatGPT: “Update the site address in astro.config.mjs to https://your-domain.com”. The sitemap and links shared on social networks then use the right address.
Step 07 every change Keep your site growing
The same loop for every change, as often as you like.
Keep your site growing
The same loop for every change, as often as you like.
- 01 Ask ChatGPT
- 02 Check on GitHub
- 03 Approve commit or merge
- 04 Live Cloudflare, 1–2 min
Editing text, adding a page or swapping a photo is always the same loop. A few typical requests:
- “Add a blog post titled ‘…’, with this text: … and the image
site-visit.jpg.” - “Create a Pricing page modelled on the Services page, and add it to the menu.”
- “Add this client testimonial to the home page: …”
A step does not
go as described?
Installing, building and deploying the theme as shipped is covered by support. Write to us with the step number and what you see on screen.